The Anchorage
Personal website of Gregory K. Maxey, Commander USN (Retired)
The Anchorage
Personal website of Gregory K. Maxey, Commander USN (Retired)
The information, illustrations and code contained in my "Microsoft Word Tips" are provided free and without risk or obligation.

However, the work is mine. If you use it for commercial purposes or benefit from my efforts through income earned or time saved then a donation, however small, will help to ensure the continued availability of this resource.
If you would like to donate, please use the appropriate donate button to access PayPal. Thank you!
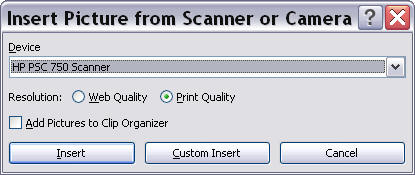
For whatever reason, the Word 2003 Insert>Picture>From Scanner or Camera command (see illustration below) was excluded from the Word 2007/2010 UI and the list of available commands.
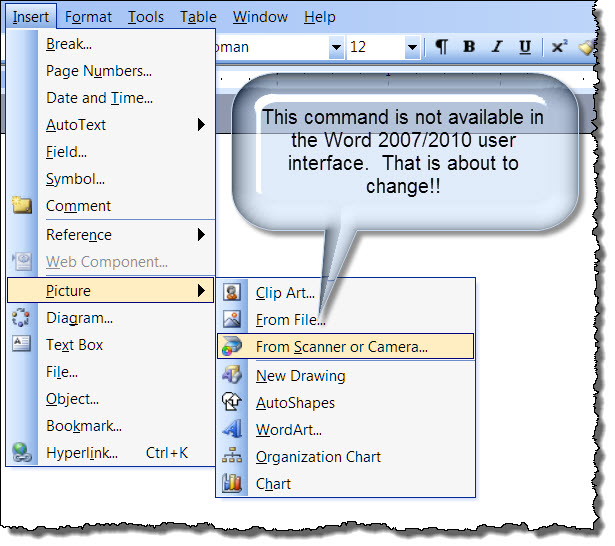
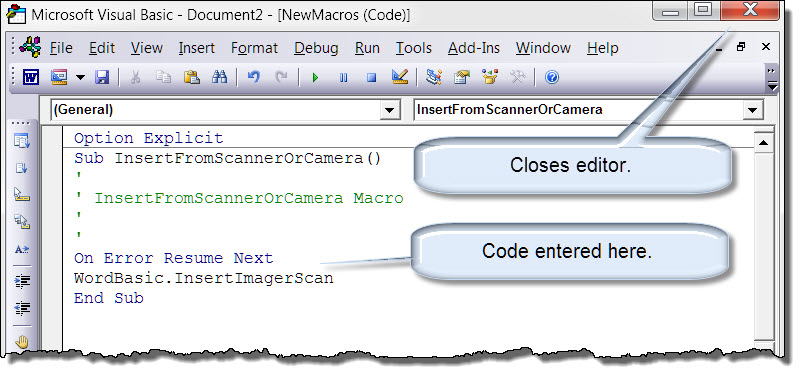
Nil despero! The feature can be restored using an old WordBasic command as follows:
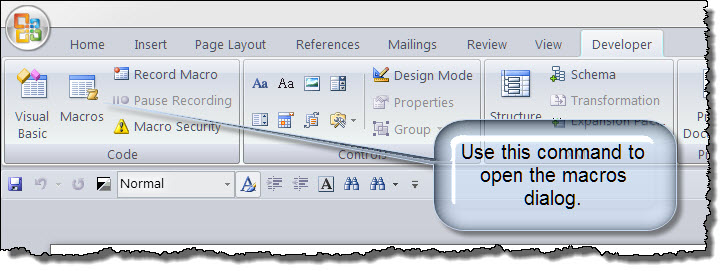
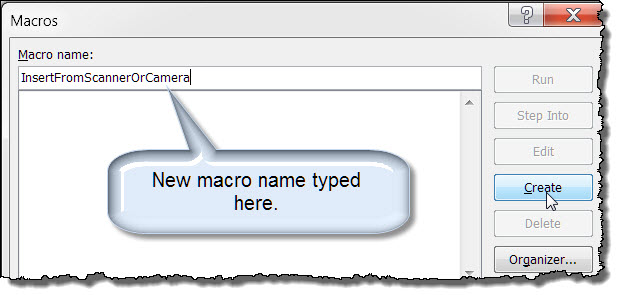
![]() Note: If you are already familiar with creating macros or already have your own macro available, then you can skip these next four steps.
Note: If you are already familiar with creating macros or already have your own macro available, then you can skip these next four steps.
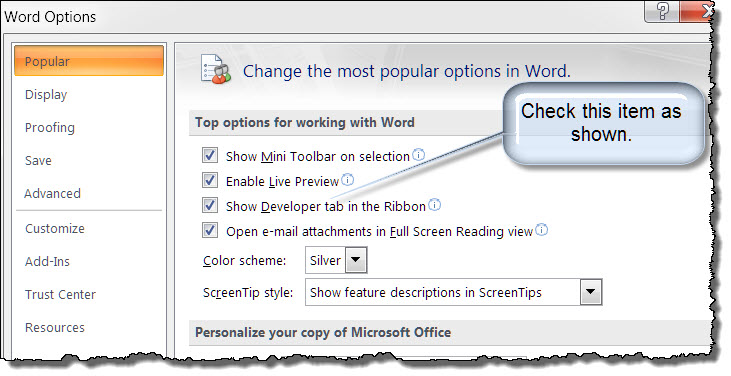
![]() Note: The tab is initially hidden by default in Word 2007. To display, click on the round Office Button (menu). Then click "Word Options" and proceed as illustrated below.
Note: The tab is initially hidden by default in Word 2007. To display, click on the round Office Button (menu). Then click "Word Options" and proceed as illustrated below.
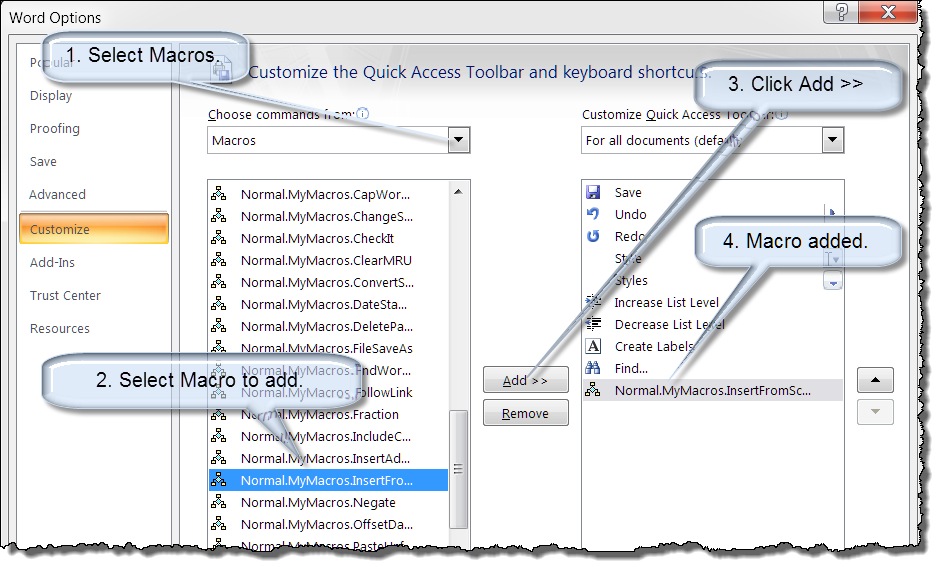
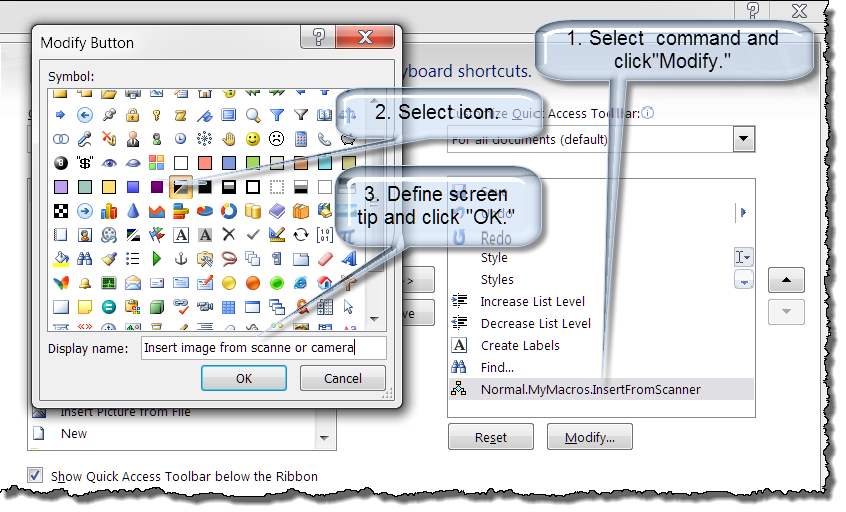
Perform the following steps to add a control to the QAT which will execute the macro you created above:
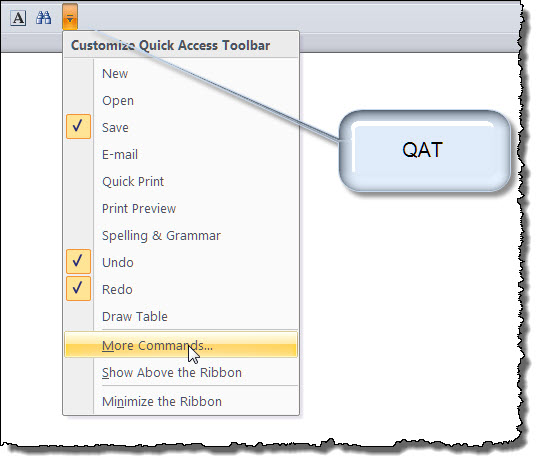
![]() Note: You can also display the dialog shown above by right clicking anywhere on the QAT and selecting "Customize Quick Access Toolbar..." or using the Office Menu>Word Options>Customize. In Word 2010 there is a dedicated customization dialog for "Quick Access Toolbar" and "Customize Ribbon." This tips page was developed using Word 2007 and actual displays in Word 2010 will vary.
Note: You can also display the dialog shown above by right clicking anywhere on the QAT and selecting "Customize Quick Access Toolbar..." or using the Office Menu>Word Options>Customize. In Word 2010 there is a dedicated customization dialog for "Quick Access Toolbar" and "Customize Ribbon." This tips page was developed using Word 2007 and actual displays in Word 2010 will vary.
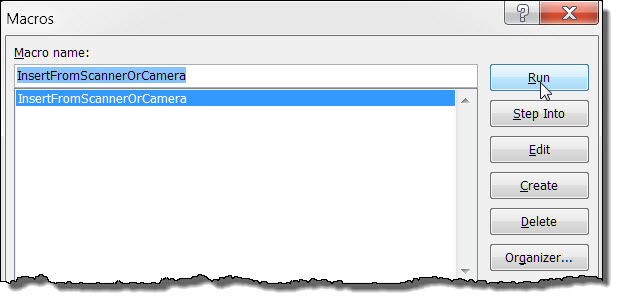
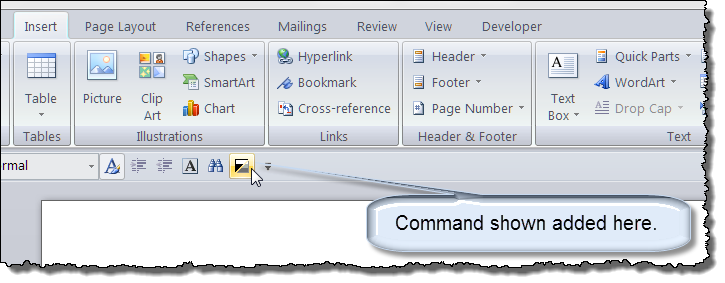
The macro can now be executed by clicking on the control now displayed on the QAT.
That's it! I hope you have found this tips page useful and informative.
The information, illustrations and code contained in my "Microsoft Word Tips" are provided free and without risk or obligation.
However, the work is mine. If you use it for commercial purposes or benefit from my efforts through income earned or time saved then a donation, however small, will help to ensure the continued availability of this resource.
If you would like to donate, please use the appropriate donate button to access PayPal. Thank you!
This page was last updated on
March 09, 2021
Website
Privacy Statement
Back to top ![]() Back to
Word Tips
Back to
Word Tips